12月 15, 2017

Notebook: Manjaro mount iso

https://forum.manjaro.org/t/iso-mounting-unmounting-issue/22293

Below content retrieved from ArchWiki

Unmounting

To unmount the image, use fusermount -u mountpoint, it works fine even with many other unmount tools like pumount or umount. The fusermount -u command can be used to disconnect any other storage devices that were mounted by other mount tools.

Using with GNOME Files

For users of GNOME there is an easy way of using fuseiso from the nautilus-context menu. First you will need the filemanager-actions package, then you need to save the following scripts to a folder of your choice (eg. /usr/local/bin):
filemanager-actions-iso-mount.sh
 #!/bin/bash
 
 FILE=$(basename "$1")
 MOUNTPOINT="$HOME/Desktop/$FILE"
 
 fuseiso -p "$1" "$MOUNTPOINT"
filemanager-actions-iso-umount.sh
 #!/bin/bash
 
 FILE=$(basename "$1")
 MOUNTPOINT="$HOME/Desktop/$FILE"
 
 fusermount -u "$MOUNTPOINT"
and make them executable:
chmod +x /path_to_scripts/filemanager-actions-iso-*
Now, start fma-config-tool (System > Preferences > Nautilus Actions Configuration).
Add a new action with the following settings:
  • Label: Mount ISO
  • Icon: A symbol of your choice (eg: gtk-cdrom)
  • Path: /path_to_scripts/filemanager-actions-iso-mount.sh
  • Parameters: %F
  • Working directory: %d
  • Basenames: *.iso ; *.nrg ; *.bin ; *.img ; *.mdf (for each add a seperated entry)
  • Match case: "must match one of"
  • Mimetypes: */*
With this action you can mount ISO-images to your Desktop. It will create a folder in ~/Desktop with the name of the iso. fuseiso will mount the iso to this folder.
And a second one:
  • Label: Unmount ISO
  • Icon: A symbol of your choice (eg: gtk-cdrom)
  • Path: /path_to_scripts/filemanager-actions-iso-umount.sh
  • Parameters: %F
  • Working directory: %d
  • Basenames: *.iso ; *.nrg ; *.bin ; *.img ; *.mdf (for each add a seperated entry)
  • Match case: "must match one of"
  • Mimetypes: */*
This second action will unmount the mounted iso and remove the folder from the desktop.
Sometimes you have to logout to be able to mount any image of the given types simply by right clicking it in Files and selecting Mount ISO. To unmount it again, just right click the corresponding folder on your desktop and select Unmount ISO.
11月 24, 2017

Notebook: Usual playlist

YouTube Playlist

Adagio
https://www.youtube.com/watch?v=BuIo8dtYyDM&list=PL3B501FED7582681A
Post 80s 
https://www.youtube.com/watch?v=Hm1cQlvBTz0&list=PLrdQYFkJU6391Ew74naqHsSJZ-JRysFrg
ChilledCow
https://www.youtube.com/channel/UCSJ4gkVC6NrvII8umztf0Ow/featured
Chilled Hop
https://www.youtube.com/user/Chillhopdotcom


Photography
chilledcow-banner
https://www.flickr.com/photos/110941763@N07/


8月 26, 2017

Ubuntu zesty retroarch vulkan issue

To test vulkan, I decided to install retroarch and see how much I can get.
However, in ubuntu, there is a missing link preventing retroarch from launching with vulkan.

To solve this, do the following commands.
cd /usr/lib/x86_64-linux-gnu/
ln -s libvulkan.so.1 libvulkan.so

8月 20, 2017

Opensuse Tumbleweedinstall steam with working tray icon.

 Tumbleweed is yet another rolling distribution.  Although comes with a ultra-useful GUI YaST, it takes lots of procedures to tame it and use it like an easier distro like Manjaro which has lots of pre-written scripts on AUR to ease things up.

 Here, I will go through the procedures required to get Steam working properly.
After installing all required proprietary drivers,

1. install libdbusmenu-gtk
zypper in libdbusmenu-gtk4.i586
2. Click Oneclick install
https://software.opensuse.org/ymp/home:opensuseitalia/openSUSE_Tumbleweed/steam.ymp?base=openSUSE%3AFactory&query=steam
3. Install steamtricks and enable it.
#zypper in steamtricks

Finally, enjoy your games.

3月 25, 2017

Dualboot 時區問題解決方法

相信各位有用過linux/其他os的朋友都面對過市區經常被改變的問題,網上有很多教學指導新手把linux設置好,由使用utc+0改為使用本地時區。
不過,這樣每次安裝新(非m$)系統后又要每次修改,絕對係個麻煩黎。

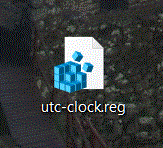
Superuser 有網友提出更改Windows時區設置的方法。做法係先將下面引文内的文字先儲存在notepad,然後更改副檔名由.txt改作.reg 如下圖。
Windows Registry Editor Version 5.00

[HKEY_LOCAL_MACHINE\SYSTEM\CurrentControlSet\Control\TimeZoneInformation]
"RealTimeIsUniversal"=dword:00000001
之後雙擊執行,按“是”更改注冊表,就大功告成了!!

如此,就不用再費心處理時區問題啦。

3月 21, 2017

🍎新 iPad 出爐!!

官網圖片

這個新iPad的32gb 價錢比 iPad air 2 還要平,不過根據官網資料,新的iPad比 air 2 重大約幾十克,而且不再有全貼合 LCD, 防反光塗層。
這個改變,對實則使用用多大影響,還要等待公佈後驗證一下。

如果實測使用良好,對於預算有限的小弟,小弟入手意欲極高!